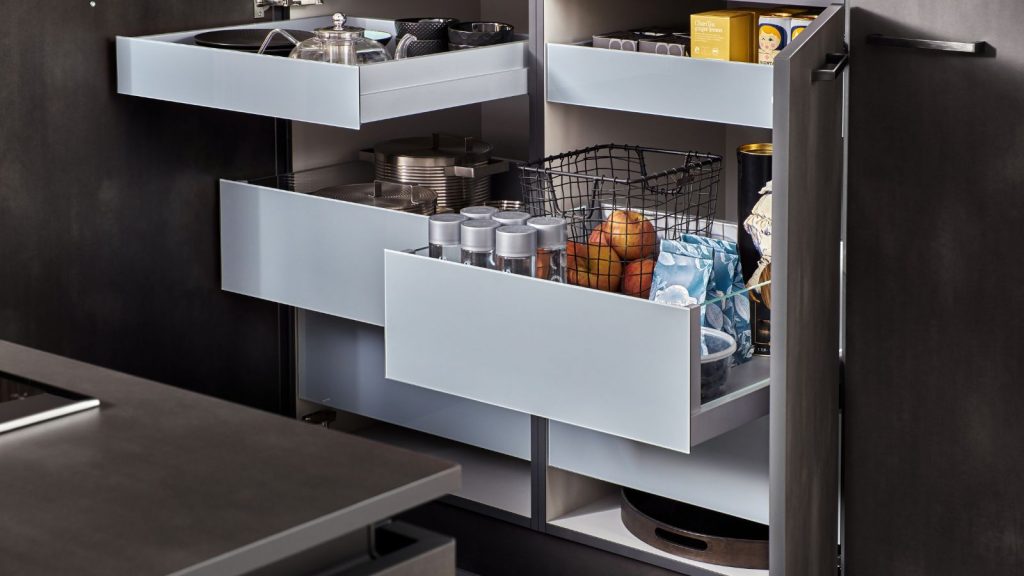
Have you ever opened your kitchen cabinets, only to be greeted by a jumble of pots, pans, and mismatched containers? If you find yourself battling clutter every time you cook, you’re not alone.
Imagine walking into a kitchen where everything is neatly organized, and you can find exactly what you need in seconds. Sounds like a dream, right? But what if I told you that creating a kitchen organizer at home is easier than you think?
With just a few simple materials and a little bit of creativity, you can transform your kitchen into a space of order and efficiency. Not only will it save you time and reduce stress, but it will also make cooking a more enjoyable experience. You’ll discover step-by-step instructions on how to make a kitchen organizer that suits your style and needs. So, are you ready to take control of your kitchen chaos and turn it into a harmonious haven? Keep reading to find out how!
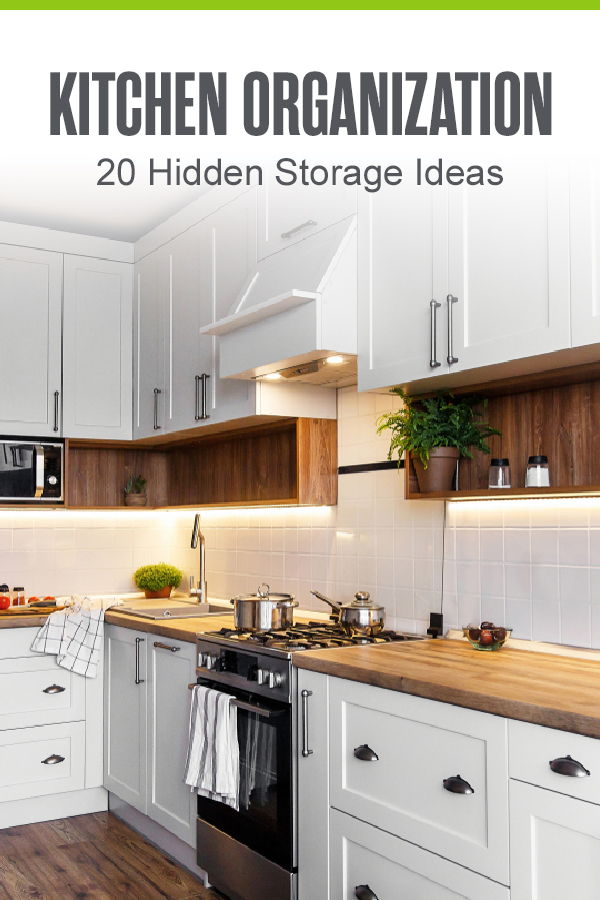
Credit: www.extraspace.com
Benefits Of A Diy Kitchen Organizer
Creating a kitchen organizer at home offers cost savings and personalization. It maximizes space, enhancing both functionality and aesthetics. Custom designs cater to specific needs, making cooking and storage more efficient.
Creating a kitchen organizer at home comes with a myriad of benefits that extend beyond simply saving money. A DIY kitchen organizer allows you to customize your storage solutions to perfectly fit your needs and style. You gain control over the materials, design, and functionality, ensuring that every inch of your kitchen space is utilized efficiently. Moreover, the process of building your own organizer can be incredibly rewarding and therapeutic. It’s a chance to express creativity while solving common kitchen clutter problems. Plus, using items you already own or repurposing materials can make this an eco-friendly endeavor.Personalized Design
With a DIY kitchen organizer, personalization is at your fingertips. You can choose colors and materials that align with your kitchen’s aesthetic. Whether you prefer rustic wooden tones or sleek metallic finishes, the choice is yours. Customize the size and compartments to accommodate your unique kitchen tools and gadgets.Cost-effective Solutions
Building your own organizer can be significantly cheaper than purchasing a store-bought alternative. By using leftover materials or items you already have, you can create a functional piece without breaking the bank. This not only saves money but also reduces waste by repurposing materials.Maximized Space Utilization
DIY organizers allow you to maximize every nook and cranny of your kitchen. Tailor shelves and drawers to fit awkward spaces or make the most of vertical storage. This ensures no space is wasted, and everything has its place, making your kitchen more efficient and tidy.Enhanced Creativity And Skills
Engaging in a DIY project enhances your creativity and develops practical skills. It’s a hands-on way to learn about design, measurement, and construction. Successfully completing your organizer boosts confidence and might inspire future projects.Eco-friendly Approach
Opting for DIY can be an eco-friendly choice, especially if you use recycled or sustainable materials. This approach helps reduce your carbon footprint and contributes to a more sustainable lifestyle. Creating something useful from otherwise discarded items is both satisfying and environmentally responsible. Do you often find your kitchen in disarray despite your best efforts to keep it organized? A DIY kitchen organizer might just be the solution you’ve been seeking.Choosing The Right Materials
Selecting suitable materials is crucial for crafting a durable kitchen organizer. Opt for sturdy wood, metal, or high-quality plastic. Consider ease of cleaning and longevity to ensure your organizer lasts and remains functional.
Choosing the right materials for your kitchen organizer is crucial to ensure durability and functionality. The materials you select can influence the overall look and feel of your kitchen, as well as how effective the organizer is at keeping your space tidy. Consider factors like ease of cleaning, aesthetic appeal, and strength when picking your materials.Understanding Your Needs
Before diving into material selection, think about what you need from your organizer. Do you require something lightweight or heavy-duty? Is your priority aesthetics, or are you more focused on practicality? Answering these questions will guide you towards the best materials for your unique setup.Wood
Wood is a popular choice for kitchen organizers due to its sturdiness and classic look. It’s easy to work with and can be customized to fit any space. Plus, wood adds a warm touch to your kitchen ambiance. However, keep in mind that it may require occasional maintenance to prevent wear and tear.Plastic
If you’re looking for a budget-friendly and versatile option, plastic is worth considering. It’s lightweight, easy to clean, and comes in various colors and designs. Plus, it’s resistant to moisture, making it ideal for kitchen environments. However, it may not be as durable as other materials.Metal
Metal offers a sleek, modern look and is incredibly durable. It’s perfect for those who want their kitchen organizer to withstand heavy use. Stainless steel, in particular, is resistant to rust and stains. If you choose metal, consider how it complements the rest of your kitchen decor.Glass
For a touch of elegance, glass can be an excellent choice. It’s easy to clean and adds a sophisticated look to any kitchen. While it’s not as sturdy as wood or metal, it’s perfect for a minimalistic, chic design. Be mindful of its fragility and ensure it’s placed away from high-traffic areas. By considering these materials and your specific needs, you’ll be well-equipped to create a kitchen organizer that not only enhances your space but also makes your kitchen chores easier. What’s your priority when choosing materials for your kitchen organizer?Essential Tools For Diy Projects
Creating a kitchen organizer requires basic tools like a screwdriver, measuring tape, and drill. Wooden planks and nails help form shelves. Paint or varnish adds a finishing touch for a polished look.
Creating a kitchen organizer at home can be an incredibly rewarding DIY project. Not only does it allow you to customize the space to fit your needs, but it also gives you the satisfaction of crafting something with your own hands. However, before you dive into this creative endeavor, it’s essential to equip yourself with the right tools. Using the right tools can make the difference between a frustrating experience and a successful project. Let’s explore some essential tools you’ll need for your DIY kitchen organizer.Measuring Tape
Accurate measurements are the backbone of any successful project. A measuring tape helps ensure that your organizer fits perfectly in your kitchen space. Measure twice to avoid costly errors and wasted materials.Drill
A reliable drill is crucial for assembling your organizer. It allows you to attach pieces securely and effortlessly. Whether you’re attaching shelves or hooks, a drill makes the job quicker and easier.Screwdriver Set
While a drill is useful, a good screwdriver set is indispensable for more delicate tasks. It provides the precision needed for tightening screws without damaging the material.Hand Saw
A hand saw is a versatile tool that can help you cut wood or other materials to size. It’s perfect for customizing your organizer and making precise cuts.Sandpaper
Smooth edges are important for both safety and aesthetics. Sandpaper helps you achieve a polished finish, making your organizer look professionally made.Wood Glue
For parts that need extra reinforcement, wood glue can provide additional strength. It’s especially useful for connecting joints and ensuring long-lasting durability.Level
To avoid crooked shelves or hooks, a level is essential. This tool ensures that every part of your organizer is perfectly horizontal or vertical, contributing to a clean and professional appearance.Safety Gear
Don’t forget about safety! Protective eyewear and gloves are crucial to safeguard yourself during the project. Prioritizing safety can prevent accidents and make your DIY experience enjoyable. Are there any tools on this list that surprise you? Having these tools on hand not only makes the process smoother but also empowers you to tackle future projects with confidence.Step-by-step Guide To Building A Kitchen Organizer
Create an efficient kitchen organizer at home with easy steps. Use materials like wood, nails, and glue. Customize shelves and dividers to fit your kitchen space. Enhance organization and accessibility effortlessly.
Creating a kitchen organizer at home can be a fun and rewarding project. Imagine having all your utensils, spices, and gadgets neatly arranged, saving you time and hassle during meal prep. With a little creativity and some basic tools, you can craft a personalized organizer that fits perfectly in your kitchen space. Here’s a step-by-step guide to help you build your very own kitchen organizer.Measuring And Planning
Begin by assessing your kitchen space. Determine where you want your organizer to go and what it needs to hold. Measure the dimensions carefully and note them down. Think about the materials you’ll use; wood is durable, but plastic and metal can be versatile. Consider the number of compartments needed. Do you need sections for spices, utensils, or pots and pans? Sketch a rough design to visualize the final product. Planning is crucial to avoid mistakes and make the process smooth.Cutting And Shaping
Once you have your plan, gather your materials. Use a saw for wood or a cutter for plastic to cut pieces to the right sizes. Always wear safety goggles and gloves when cutting materials. Sand the edges for a smooth finish; this prevents splinters and gives a polished look. If you’re using metal, ensure you have the right tools for cutting and shaping. Remember, precision in cutting leads to easier assembly and a sturdier organizer.Assembling The Organizer
Now comes the exciting part—putting it all together! Lay out your pieces according to your plan. Use screws or nails for wood, or adhesive for plastic, to secure the sections. Double-check your design to ensure everything fits. You might need a drill for added stability, especially if your organizer is large. Test the sturdiness by placing items on it. Adjust any loose parts and make sure it sits well in its designated space. Building a kitchen organizer is not just about functionality; it’s also about adding a personal touch to your kitchen. As you work through each step, think about ways to customize your organizer. Maybe paint it a color that matches your kitchen or add labels for easy access. Are there any creative elements you could incorporate to make it uniquely yours?Creative Design Ideas
Creating a kitchen organizer at home offers unique design possibilities. You can personalize it to suit your needs and space. Infusing creativity makes organizing both fun and functional. Let’s explore some inspiring design ideas.
Using Recycled Materials
Repurposing old items adds charm and sustainability. Think of using wooden crates as shelves. Paint them to match your kitchen’s color scheme. Tin cans can become utensil holders. Wrap them in fabric or paper for a fresh look. Even old jars can store spices or snacks. Attach them under shelves for easy access. This approach not only saves money but also reduces waste.
Incorporating Adjustable Shelves
Adjustable shelves offer flexibility. They let you modify space as per your needs. Use brackets and boards for a simple setup. You can move the shelves up or down. This is great for different-sized items. Adjustable shelves make it easy to rearrange and maximize storage. They are ideal for growing collections. Plus, they allow easy cleaning access.
Adding Hooks And Compartments
Hooks and compartments enhance functionality. Install hooks on walls or inside cabinets. They can hold mugs, utensils, or even pots. Use compartments to separate items. Small boxes or dividers can organize drawers. Keep similar items together for quick access. This method reduces clutter and enhances kitchen efficiency. Plus, it keeps countertops clear and organized.
Painting And Finishing Touches
Painting and Finishing Touches Enhance your homemade kitchen organizer with vibrant paint for a fresh look. Add finishing touches like handles or labels for functionality.
Painting and finishing touches bring life to your kitchen organizer. This stage transforms simple wood into a vibrant piece. Choosing the right paint and finish is key. It should match your kitchen style. Use colors that make you happy. This is your chance to be creative and add personal flair.Choosing Paint Colors
Select colors that blend with your kitchen decor. Neutral tones are timeless and versatile. Bright colors add energy and fun. Consider the mood you want to create.Preparing The Surface
Start by sanding the wood surface. This ensures paint adheres smoothly. Dust off any particles after sanding. Clean the surface with a damp cloth. Let it dry completely.Applying Primer
Primer helps paint stick better. It also covers any imperfections. Apply a thin coat evenly across the surface. Allow it to dry thoroughly before painting.Painting Techniques
Use a brush for detailed areas and edges. Rollers are great for larger surfaces. Apply paint in thin layers. This avoids drips and uneven texture. Let each layer dry before adding another.Adding Finishing Coats
Seal the paint with a finishing coat. This protects the surface from scratches and stains. Choose matte or glossy finish based on preference. Apply evenly and let it cure for durability.Personalized Details
Add stencils or decals for a unique touch. You can paint patterns or add borders. Experiment with textures for a distinct look. Personal touches make your organizer special. With these steps, your kitchen organizer will shine and serve you well.Maintenance And Upkeep
Keeping your homemade kitchen organizer in good shape is essential. Regular maintenance ensures it remains functional and appealing. Simple upkeep routines can extend its lifespan and keep your kitchen tidy. Here’s how you can maintain your kitchen organizer effectively.
Regular Cleaning
Dust and dirt can accumulate quickly on your organizer. Use a damp cloth to wipe surfaces weekly. This prevents grime build-up and keeps it looking fresh. For wooden organizers, consider using a wood cleaner. It helps maintain the finish and prevents damage.
Avoid Overloading
Each section of your organizer has a weight limit. Avoid stuffing it with too many items. Overloading can cause shelves to sag or break. Distribute weight evenly for better stability and longevity.
Inspect For Damage
Regularly check for any signs of wear or damage. Look for loose screws or cracked shelves. Repair minor issues promptly to avoid bigger problems. Tighten any loose parts using a screwdriver.
Reorganize Periodically
Take some time each month to reassess your storage needs. Remove items you no longer use or need. This helps maintain order and ensures efficiency in your kitchen space.
Protect From Moisture
Keep your organizer away from water sources. Moisture can damage materials like wood or metal. Use coasters or liners to protect surfaces from spills.
Use Protective Pads
Place felt pads under heavy items. They prevent scratches and dents on your organizer. These pads also make it easier to move items without damage.

Credit: food52.com
Common Mistakes To Avoid
Overloading shelves with heavy items can lead to breakage. Choosing the wrong materials might result in a flimsy organizer. Neglecting measurements can cause the organizer to not fit your space properly.
Creating a kitchen organizer at home can be a fun and rewarding project. Yet, it’s easy to make mistakes during the process. These errors can lead to frustration or wasted resources. Avoid these common pitfalls to ensure your organizer is both functional and attractive. Here’s a guide to help you steer clear of these mistakes.Overlooking Measurement Accuracy
Always measure your space accurately. Incorrect measurements can lead to a poorly fitting organizer. Use a tape measure, and double-check your numbers. This ensures your organizer fits perfectly in your kitchen.Ignoring Material Quality
Choose durable materials for your kitchen organizer. Weak materials may not hold up over time. Look for sturdy wood or metal options. This ensures your organizer lasts long and remains functional.Forgetting About Functionality
Design your organizer with practicality in mind. Think about your daily kitchen tasks. An organizer should make these tasks easier. Consider ease of access and storage needs.Skipping The Planning Phase
Plan your organizer before starting. Skipping this step can lead to design flaws. Sketch a layout and decide on features. This helps you create a more efficient organizer.Neglecting Aesthetic Appeal
Don’t ignore the look of your organizer. An attractive design enhances your kitchen’s appeal. Choose colors and styles that match your kitchen décor. This makes your organizer both functional and pleasing to the eye.Inspiration From Successful Diy Projects
Creating a kitchen organizer at home can spark creativity and offer a sense of achievement. Use recycled materials like jars and boxes to design unique storage solutions. This approach not only saves money but also adds a personal touch to your kitchen space.
Getting inspired by successful DIY projects can spark your creativity and show you that crafting your own kitchen organizer is within reach. Seeing what others have achieved can motivate you to adapt these ideas to fit your unique kitchen needs. Whether it’s a sleek spice rack or a versatile utensil holder, these projects demonstrate that functionality and style can go hand in hand, even with DIY creations.Repurposing Everyday Items
Consider giving your old items a new lease on life. An unused shoe organizer can be transformed into a hanging pantry for snacks or spices. By simply cutting it to your desired size and hanging it on the back of a door, you create extra storage without cluttering your counters.Upcycling Old Wooden Pallets
Old wooden pallets can be a treasure trove for DIY enthusiasts. With a little sanding and painting, pallets can be turned into rustic wall-mounted shelves. These shelves not only add charm but also provide a perfect spot for jars and small kitchen tools.Customizing Cardboard Boxes
Cardboard boxes aren’t just for storage in the attic. Reinforce them with decorative paper or fabric, and you have custom-made organizers for your drawers. Use them to separate utensils or keep your pantry goods tidy.Creating Magnetic Spice Racks
Magnetic strips are not just for knives. Attach small metal containers to a magnetic strip on your wall or fridge. This keeps your spices accessible and frees up valuable counter space.Using Pvc Pipes For Utensil Holders
PVC pipes are surprisingly versatile. Cut them into sections, paint them, and secure them together to create a chic utensil holder. It’s a simple yet effective way to keep your cooking tools organized.Transforming Vintage Frames
Don’t overlook old picture frames. By adding hooks or corkboard to a vintage frame, you can create an elegant message center for recipes or grocery lists. Hang it in a convenient spot to blend functionality with decor. Which of these projects will you try first? The possibilities are endless, and your kitchen could benefit from your creative touch.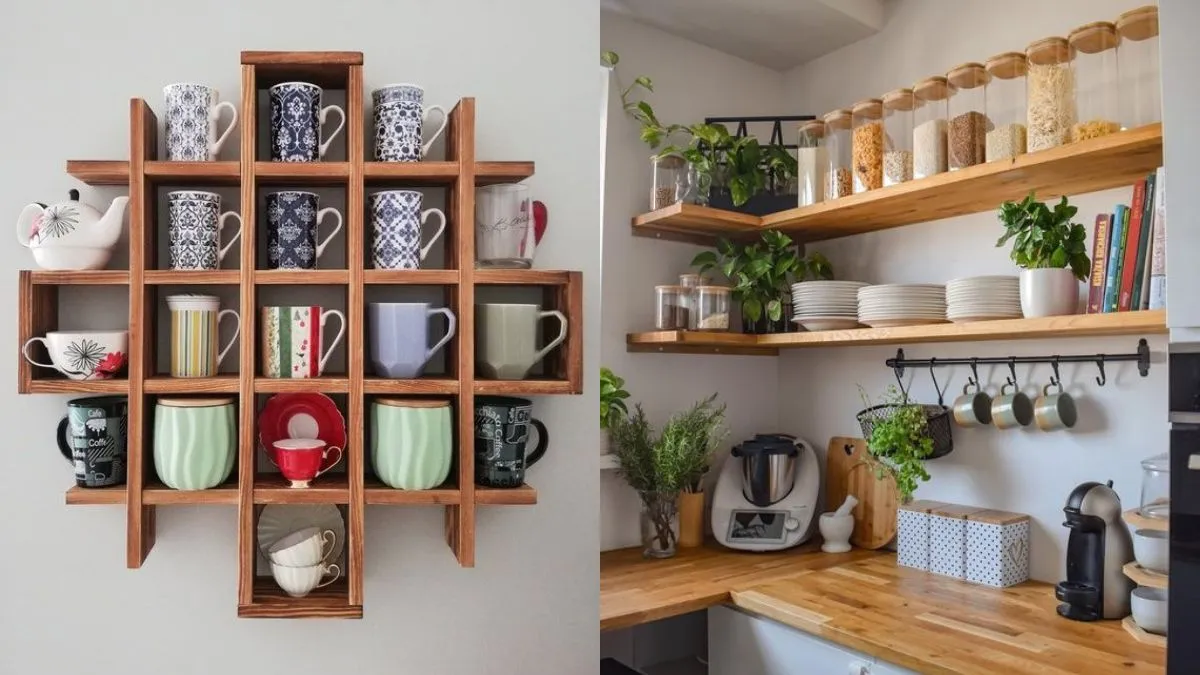
Credit: www.herzindagi.com
Frequently Asked Questions
What Materials Are Best For Kitchen Organizers?
Use sturdy materials like wood, metal, or plastic for durability. Recycled items such as cardboard or tin cans can also be effective. Ensure the materials are easy to clean and maintain. Choose items that match your kitchen’s aesthetic for a cohesive look.
How To Make A Simple Spice Rack?
Use a wooden plank and small jars for a DIY spice rack. Attach the plank to the wall or cabinet. Arrange jars in a single row for easy access. Label jars for quick identification. This simple setup saves space and keeps spices organized.
Can I Use Recycled Items For Organizers?
Yes, recycled items can be perfect for organizers. Use old boxes, jars, or baskets to create unique storage solutions. They are eco-friendly and customizable. Paint or decorate them to match your kitchen style. Recycling reduces waste and saves money.
What Tools Are Needed For Making Organizers?
Basic tools like a screwdriver, hammer, and measuring tape are essential. You may also need a saw for cutting wood. Glue and nails can help with assembly. Ensure you have safety gear like gloves and goggles. These tools will help you create sturdy organizers.
Conclusion
Creating a kitchen organizer at home is simple and rewarding. You can use everyday materials to save space and money. Personalize your organizer to fit your needs and style. Enjoy the satisfaction of a tidy kitchen without spending much. Organizing your kitchen can make cooking more enjoyable.
A neat space helps you find items quickly. Try different ideas and see what works best for you. Remember, creativity is your best tool. So, start organizing today and transform your kitchen into a functional space!