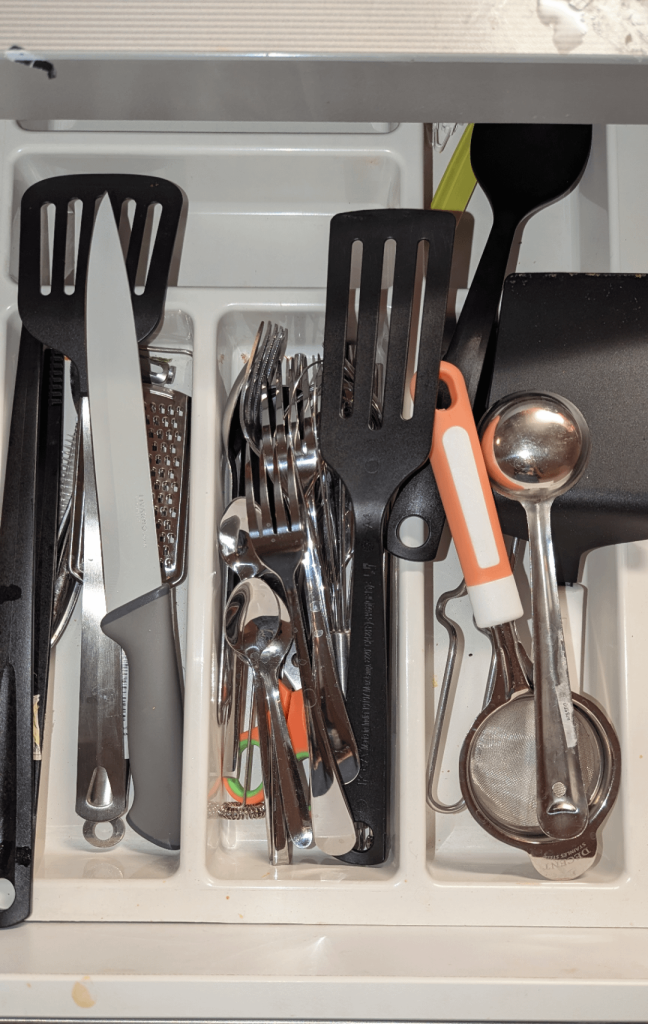
Are you tired of rummaging through a cluttered drawer every time you need a spatula or whisk? Imagine opening your kitchen drawer to find everything neatly organized and easily accessible.
Creating an inexpensive kitchen utensil drawer organizer doesn’t require a trip to the store or a big budget. In fact, you can make it using items you already have at home. Picture this: every time you cook, you feel calm and in control because your utensils are organized and at your fingertips.
This article will guide you step-by-step, showing you how to transform your messy drawer into a tidy, efficient space. You’ll discover simple tips and tricks that can save you time and stress. Plus, you’ll get a sense of accomplishment from creating something yourself. Dive in to find out how easy it is to upgrade your kitchen with a budget-friendly organizer!
Materials Needed
Creating an inexpensive kitchen utensil drawer organizer is not only a fun DIY project but also a practical way to declutter your kitchen. Before you dive into assembling, gathering the right materials is crucial. Having the right supplies and tools at your disposal can make the process smooth and enjoyable. Let’s explore the materials you’ll need to get started on this budget-friendly project.
Budget-friendly Supplies
- Cardboard:An excellent choice for dividers, especially if you have leftover boxes from deliveries.
- Decorative Contact Paper or Wrapping Paper:This adds a splash of color and pattern to your organizer.
- Glue or Double-Sided Tape:Essential for securing the paper to the cardboard.
- Ruler and Pencil:For precise measurements and marking cut lines.
- Scissors or Box Cutter:Necessary for cutting the cardboard to size.
These supplies are not only affordable but can often be found lying around your home. Who knew that old cardboard could turn into a stylish organizer?
Tools Required
- Measuring Tape:Useful for measuring the dimensions of your drawer to ensure a perfect fit.
- Hot Glue Gun (optional):Provides a more secure adhesion compared to regular glue.
- Cutting Mat:Protects your table or countertop while cutting materials.
With these simple tools, you’ll be well-equipped to create a custom organizer that perfectly fits your drawer. Imagine the satisfaction of opening a drawer that’s organized exactly to your liking!
As you gather these materials, consider what you already have at home. Could repurposing items save you even more money? This project is not only about organizing but also about making the most of what you already own.
Credit: www.youtube.com
Measuring Your Drawer
Organizing your kitchen drawer doesn’t have to be expensive or complicated. Creating an inexpensive utensil organizer starts with accurate measurements. Knowing the dimensions ensures everything fits perfectly. It also helps you utilize space efficiently. This section will guide you through assessing and determining the right measurements for your drawer organizer.
Assessing Space
Begin by emptying the drawer. Remove all items to see the available space. This helps you visualize the layout. Consider the items you want to store. Group similar utensils together. Decide if you need separate compartments for each type. This step informs the design of your organizer.
Determining Dimensions
Use a tape measure to find the drawer’s length, width, and depth. Measure from the inside edges for accuracy. Note each measurement down. These dimensions are crucial for cutting materials later. Ensure the measurements allow for easy access and smooth opening and closing.
Designing The Organizer
Transform your cluttered kitchen drawers with a budget-friendly utensil organizer. Use cardboard or recycled materials to create sections. Tailor the sizes to fit your utensils perfectly, keeping everything neat and accessible.
Designing an effective kitchen utensil drawer organizer requires creativity and planning. A well-designed organizer saves time and enhances kitchen efficiency. First, focus on layout planning to ensure every utensil has its place. Then, consider adding customizable compartments for flexibility. This approach creates a tidy and adaptable kitchen space.Layout Planning
Start by measuring your drawer dimensions. This ensures a perfect fit for your organizer. Make a list of utensils you use daily. Group similar items together, like spatulas with spatulas. Think about how often you use each item. Place frequently used items in the most accessible spots. Sketch a simple layout on paper. Visualize where each utensil will go.Customizable Compartments
Use cardboard or thin wood for dividers. These materials are cost-effective and easy to cut. Customize compartment sizes to fit your utensils. Large slots work well for spatulas and ladles. Smaller slots are ideal for forks and spoons. Velcro strips can make compartments adjustable. This allows you to rearrange as needed. Use fabric or paper to line compartments. It adds a touch of style and protects utensils.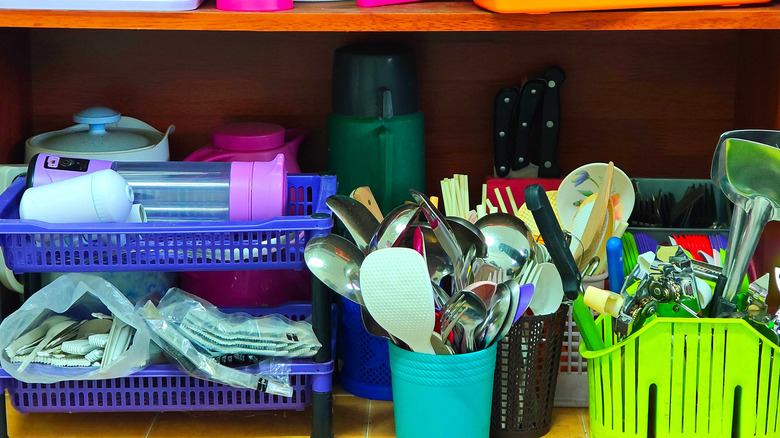
Credit: www.housedigest.com
Cutting And Assembling
Cutting and assembling materials like wood or cardboard can help create a budget-friendly kitchen utensil drawer organizer. Measure drawer dimensions, cut pieces accordingly, and assemble them to fit snugly. This DIY project organizes utensils efficiently, saving space and money.
Creating a kitchen utensil drawer organizer doesn’t have to be expensive or complicated. With some basic materials and tools, you can craft a neat and functional organizer. The process involves cutting and assembling, which are crucial to achieving a perfect fit for your drawer and utensils. Let’s dive into these essential steps.Precise Cutting Techniques
Start by measuring your drawer’s dimensions. This ensures your organizer fits perfectly. Use a tape measure for accuracy. Next, choose the material for your organizer. Lightweight plywood or sturdy cardboard work well. Mark the dimensions on your material with a pencil. A ruler or straight edge helps keep lines straight. For cutting, use a sharp utility knife or a saw. If using plywood, a saw is preferable for clean cuts. Ensure the cuts are precise. This prevents gaps and ensures pieces fit together seamlessly.Assembly Steps
Gather all your cut pieces. Arrange them according to your drawer’s layout plan. Start by assembling the outer frame. Use wood glue or strong adhesive for plywood. For cardboard, hot glue works effectively. Hold pieces together until the glue sets. Next, position the dividers inside the frame. These separate utensils and keep them organized. Ensure dividers fit snugly within the frame. Apply glue to the edges of the dividers. Press them firmly in place. Allow the glue to dry completely before using the organizer. Test the fit inside your drawer. Make adjustments if necessary. The organizer should sit flat and stable. With your DIY organizer ready, enjoy a clutter-free kitchen drawer.Finishing Touches
Create a budget-friendly kitchen utensil drawer organizer using simple materials. Measure your drawer, cut cardboard dividers, and arrange them to fit your needs. This DIY solution keeps utensils tidy without spending much.
Once you’ve assembled your kitchen utensil drawer organizer, it’s time to focus on the finishing touches. These final steps ensure that your organizer not only functions well but also looks great in your kitchen. The process is simple, and a few thoughtful additions can make a big difference in the overall appeal and usability of your organizer.Smoothing Edges
Sharp or rough edges can be a nuisance. Use sandpaper to smooth out any jagged corners or edges. A fine-grit sandpaper works best for this task, leaving a sleek finish that feels nice to the touch. Consider running your fingers along the edges to ensure they’re completely smooth. This step prevents any accidental snags or scratches when you’re reaching for a utensil. Taking the time to smooth edges also adds a professional touch to your DIY project.Decorative Options
Adding decorative elements can transform your organizer from purely functional to visually pleasing. Consider painting the wood in a color that complements your kitchen’s theme. You could also use washi tape for a quick, decorative border. Stencils are a great way to add patterns or designs. If you’re feeling creative, you might even personalize it with your initials or a fun quote. Why not add a layer of clear varnish? It protects the wood and gives it a polished, finished look. These small touches can make your kitchen space feel more personalized and inviting. What creative ways can you think of to make your organizer uniquely yours?Installation Tips
Measure your drawer and gather cardboard or foam board. Cut materials to fit, creating sections for utensils. Secure pieces with glue or tape, allowing them to dry thoroughly before use.
Installing an inexpensive kitchen utensil drawer organizer can transform your chaotic drawer into a functional space. It’s not just about placing it in the drawer; it’s about ensuring it stays in place and works efficiently. Here are some installation tips to help you secure and adjust your organizer for the perfect fit.Securing The Organizer
To keep the organizer from sliding around each time you open the drawer, consider using adhesive strips or non-slip pads. Apply a few strips on the bottom of the organizer before placing it in the drawer. This simple trick can make a big difference in stability. Another option is to use small rubber bumpers at the corners. They provide an added grip and prevent unnecessary movement.Adjustments For Fit
Not all drawers are created equal. Sometimes your organizer might need a little tweaking to fit just right. If your organizer is adjustable, expand or contract it until it fits snugly. A snug fit ensures your utensils stay in place. For fixed-size organizers, consider adding foam padding to fill any gaps. This not only secures the organizer but also prevents utensils from slipping underneath. Think about your drawer’s depth and height. If the organizer is too tall, your drawer may not close properly. Trim excess height if needed, or choose a lower-profile organizer. Have you ever struggled with a drawer that just won’t close smoothly? Ensuring your organizer fits well can eliminate this common annoyance.Maintenance And Care
Proper maintenance ensures your kitchen utensil drawer organizer remains functional and tidy. Regular care will keep it looking fresh and extend its life. Follow these simple tips to maintain your organizer effectively.
Cleaning Routine
Consistent cleaning prevents dust and grime buildup. Use a damp cloth to wipe the surfaces weekly. For stubborn stains, mix mild soap with warm water. Gently scrub the area using a soft brush. Dry the organizer completely before placing it back in the drawer.
Ensure all compartments are dry. Moisture can lead to mold and damage. Avoid harsh chemicals. They can damage the material and affect the finish.
Long-term Durability
Durability depends on the material and care. Use liners to protect the base from scratches. Avoid overloading the compartments. Excess weight can warp the structure. Inspect for wear and tear regularly. Repair any loose parts to prevent further damage.
Consider rotating your utensils. This practice ensures even wear across the organizer. Proper care extends its life, keeping your kitchen tidy and efficient.

Credit: www.familyhandyman.com
Creative Ideas
Organizing kitchen utensils can be a challenge. Expensive organizers are not always the best option. Creative ideas can help you make an inexpensive drawer organizer. Use alternative materials and innovative designs to create practical solutions. These ideas can transform cluttered drawers into neat spaces.
Alternative Materials
Cardboard is a versatile choice for making drawer dividers. Cut it into strips to fit your drawer dimensions. Glue or tape the strips together to form compartments. Cardboard is easy to work with and readily available. Shoe boxes can also be repurposed. Trim them down to fit inside the drawer. They can hold larger utensils like spatulas and ladles.
Plastic containers from takeout meals make great organizers. They are durable and easy to clean. Arrange them in the drawer to create sections for different utensils. Old cereal boxes can be used in a similar way. Cut them to size and cover with decorative paper for a polished look.
Innovative Designs
Consider using tension rods as dividers. Place them horizontally to create sections. Adjust the rods to fit the size of your utensils. This method is adjustable and quick to set up. Use foam board for a custom-fit organizer. Measure the drawer and cut the board to fit. Design compartments to suit your utensil sizes.
Magnetic strips can hold metal utensils. Attach them inside the drawer for easy access. This keeps utensils from cluttering the drawer. Pegboards offer flexibility in design. Cut them to fit your drawer and use hooks to organize. Pegboards can hold utensils in place securely.
Frequently Asked Questions
How Can I Organize Kitchen Utensils Cheaply?
Organizing kitchen utensils on a budget is easy with DIY solutions. Use cardboard boxes or old shoe boxes as dividers. Cut them to fit your drawer size and arrange them for easy access. This method is affordable and customizable, ensuring a tidy kitchen without spending much money.
What Materials Are Best For Diy Organizers?
Cardboard and plastic containers are ideal materials for DIY organizers. Cardboard is eco-friendly and easily customizable. Plastic containers offer durability and are easy to clean. Both materials are affordable and widely available, making them suitable for creating simple yet effective kitchen utensil organizers.
How Do I Customize My Organizer For Utensils?
To customize your organizer, measure your drawer space first. Cut cardboard dividers according to your utensils’ size and layout preferences. Arrange them to create separate sections for different items. This approach allows flexibility and personal touch, ensuring your organizer meets your unique kitchen needs.
Can I Use Recycled Materials For Organizers?
Yes, recycled materials are perfect for creating organizers. Use old shoe boxes, cereal boxes, or plastic containers. These items can be repurposed into dividers, reducing waste while saving money. Recycled materials offer an eco-friendly and cost-effective way to organize your kitchen utensils.
Conclusion
Creating a kitchen utensil drawer organizer doesn’t have to be costly. With simple materials, you can enhance your kitchen’s functionality. Organizers help keep your utensils neatly arranged. No more digging through cluttered drawers. They save time and reduce stress when cooking.
Plus, they make your kitchen look tidy and inviting. Try crafting your own custom organizer. It’s a fun and rewarding project. With a little creativity, your kitchen can be more organized. You’ll enjoy cooking even more. Start today and transform your drawer space with ease!